Issue Description
You successfully implemented Azure AD Authentication in your Android app with the Microsoft Authentication Library. The application built and executed perfectly and passed all QA testing with flying colors. And then you published the application on Google Play. And authentication doesn’t work after installing the app.
If you exposed authentication error messages to the user, or had them sent to your team, then you might see an error like this:
“The redirect URI in the configuration file doesn’t match with the one generated with the package name and signature hash. Please verify the uri in the config file and your app registration in Azure portal.”
Another potential behavior that might indicate this problem is this: During development and QA testing, you successfully set up your app to use a supported broker to handle authentication and SSO. However, after deployment through Google Play and installation, the app no longer uses the broker for authentication.
The Cause
When an Android application is built for installation on a device, it is built as an “apk” compressed package and then signed by a certificate. This certificate signing ensures that the person who built the application was the one who owns the private signing key. This prevents potential impersonation attempts where a hacker might modify the application in a harmful way since the hacker will not be able to sign their version of the application with the original private signing key.
In the past, Android developers owned and maintained their own private signing keys. However, now, Google Play Services generate and maintain their own private signing key for an Android Developer. This is actually a good thing, since the key will be securely stored by Google. The developer still maintains an upload key so that Google Play Services can verify the authenticity of an uploaded app bundle, but the actual signing is done by the Google-owned signing certificate when a user installs the app on their device.
How is this relevant? The Microsoft Authentication Library (MSAL) for Android Native and Microsoft Supported Authentication Brokers use the public signature hash of an installed application to identify it during interaction through the Android Operating system necessary during authentication. The public signature hash of an application installed by Google Play will be different from the same application installed before publishing to Google Play. Because of this, Msal will be configured to use the incorrect signature hash.
How To Fix It
Generally, there are three major steps in solving this issue.
- Find out the new Signature Hash resulting from Google Play Installation
- Add a new Redirect URI to the App Registration in the Azure Portal with the new signature hash
- Adapt the Msal Configuration within the application code to use the new Redirect URI and Signature Hash.
Each of these three steps are covered in more detail below:
Step 1:
Find the New Signature Hash
There are two ways to get the new Signature Hash: Use Msal’s “Package Inspector” tool and to get the Signature Hash from the Google Play Console.
For details on how to install and use the Msal Package Inspector, see my article here:
https://blogs.aaddevsup.xyz/2022/03/package-inspector-for-msal-android-native-guide/
Google Play Console
To get the Signature Hash from the Google Play Console, first go to the Console and log in with your Google Developer account.
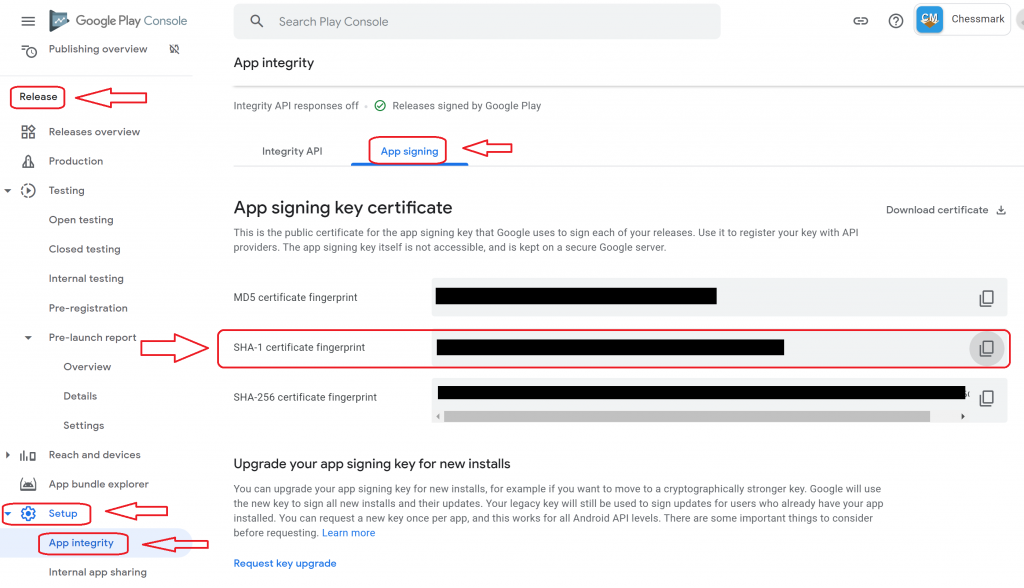
Once you are in the Google Play Console, select the app you are working on, then look to the left side of the screen. Under the “Release” category, expand “Setup” and click on “App Integrity”.
Now click on the “App signing” tab and you will see the “fingerprint” of the app signing key in three different variations. Copy the one indicated in the screenshot below:
PowerShell Script to Encode the Signature Hash
Copy the “SHA-1” fingerprint and paste it into the following PowerShell script as the value of the $Thumbprint variable. Run the script to obtain the base64 encoded fingerprint that Msal needs.
$Thumbprint = "paste your fingerprint here"
$Thumbprint = $Thumbprint.Replace(":", "")

$Bytes = [byte[]]::new($Thumbprint.Length / 2)

For($i=0; $i -lt $Thumbprint.Length; $i+=2){
    $Bytes[$i/2] = [convert]::ToByte($Thumbprint.Substring($i, 2), 16)
}

$hashedString =[Convert]::ToBase64String($Bytes)

Write-Host $hashedString
Step 2:
Add a new Redirect URI to the App Registration in the Azure Portal with the new signature hash
If you have come this far in developing an Android App using Msal, you likely already understand how to complete this step; however, I will provide basic guidance here.
Note: I highly recommend adding a new redirect URI rather than modifying the existing redirect URI. Your app registration can contain many redirect URIs. Additionally, modifying the existing redirect URI might result in problems with the development version of your app. This could create headaches while troubleshooting, developing updates, etc.
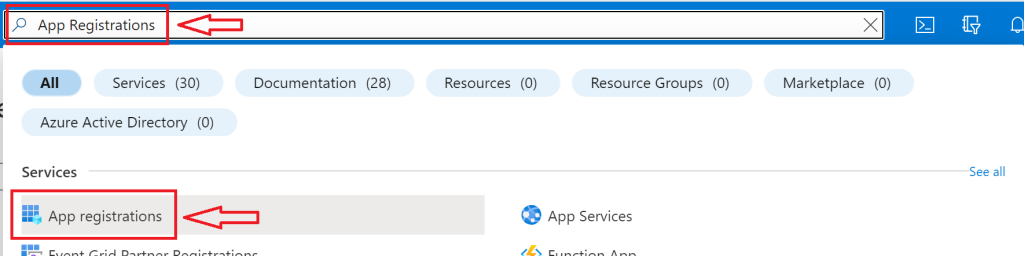
Log in to your Azure Portal at portal.azure.com and navigate to the App registrations portal. This can be done quickly and easily by searching for “App registrations” at the top of the portal screen as indicated in the following screenshot:
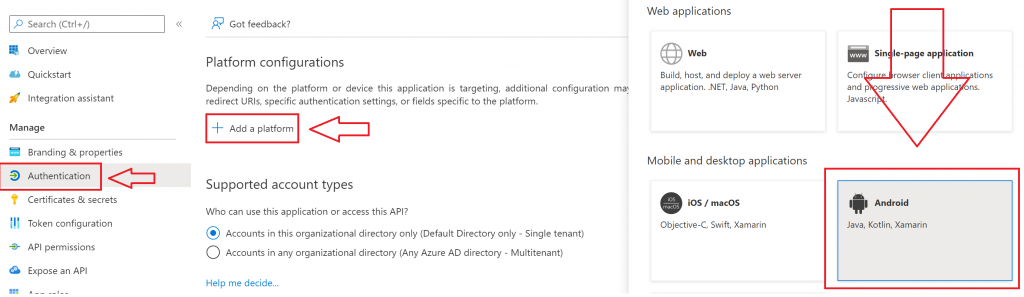
Select the app registration for your Android app, click on “Authentication” on the left side of the screen, and then click to “Add a platform”. Select “Android” as indicated in the following screenshot.
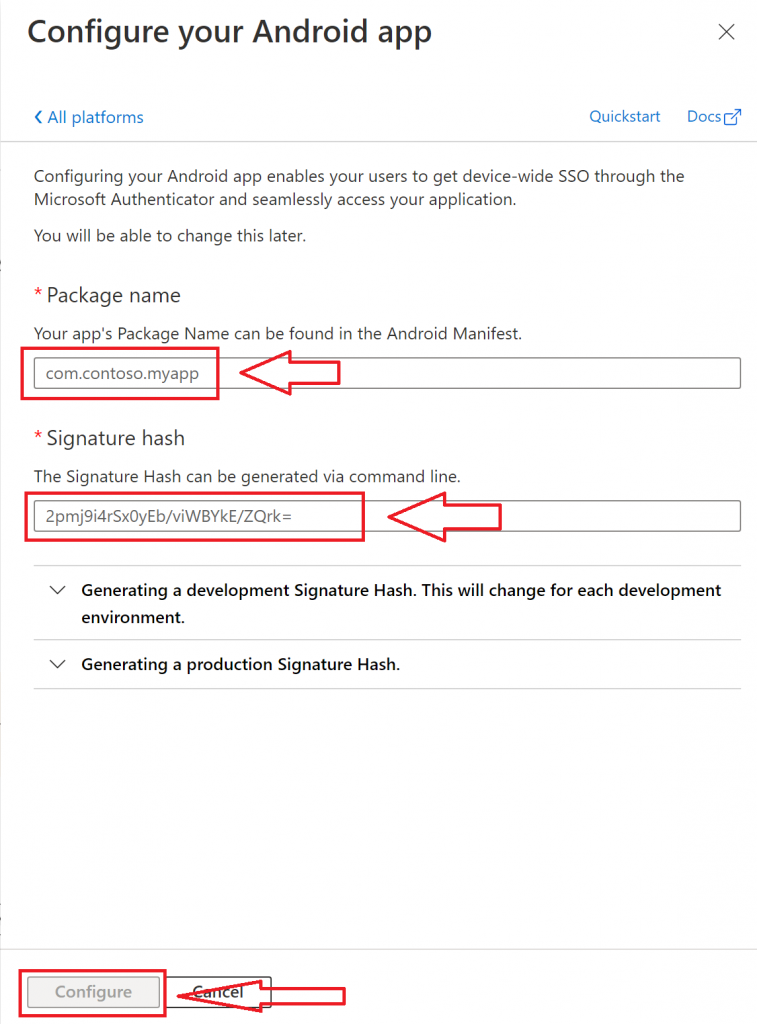
Enter the package name of your Android app and the new signature hash in the indicated fields and then click “Configure”. Note that it is fine to have the same package name in multiple Android Redirect URIs as long as the signature hash is different.
Step 3:
Adapt the Msal Configuration within the application code to use the new Redirect URI and Signature hash
As previously mentioned, at this point in the development process, you are likely already familiar with this process. I will cover the basics here.
There are two things you need to change in the application code: The Msal configuration file and the Android Manifest file.
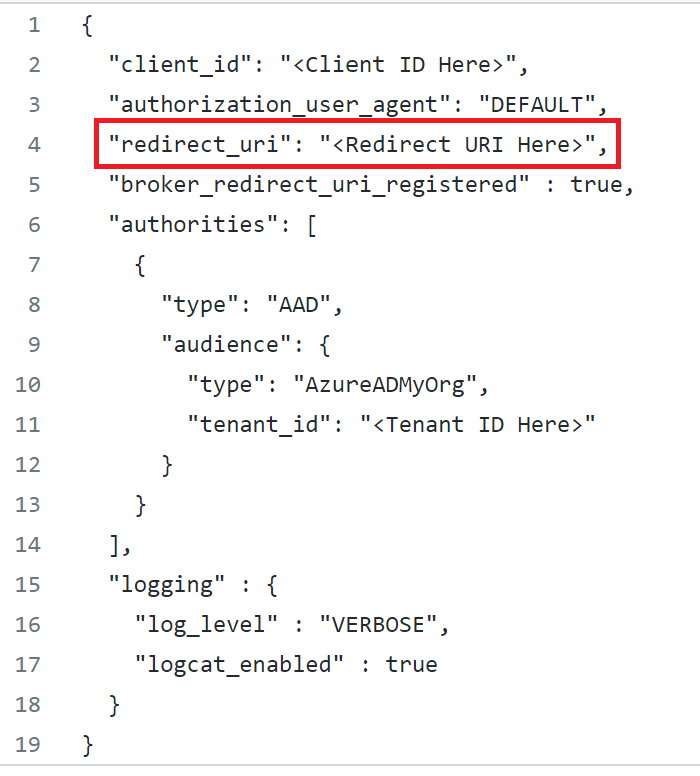
Msal Configuration File:
The only thing to change is the Redirect URI. Copy and paste this directly from the Azure Portal. In the Azure Portal, you will notice that the signature hash portion of the redirect URI is http encoded. It should remain http encoded.
Android Manifest File:
The only thing to change in the Android Manifest File is the android:path property within the tag for the “com.microsoft.identity.client.BrowserTabActivity” activity indicated in the following screenshot. Paste the signature hash as the value for this property.
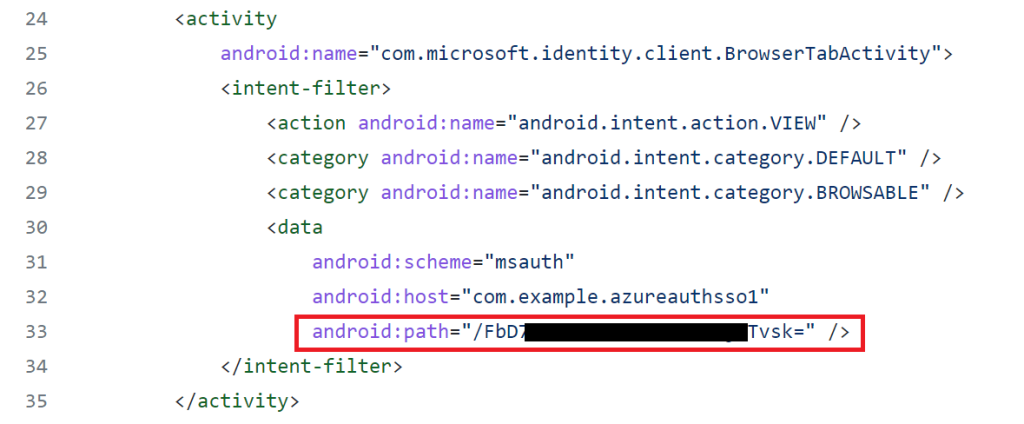
Important Notes:
-make sure to include the forward slash at the front of the signature hash as seen in the above screenshot
-In contrast to the Redirect URI, the signature hash here is not http encoded