Introduction:
This post builds on the information from the previous post and I will assume that you already have an Azure Key Vault, an AAD Application registration, and a certificate file. We will cover the following steps in this blog in order to use a certificate from an Azure Function App:
- Create an Azure Function App
- Upload the certificate to the Function App
- Configure the Function App to load certificate file
- Create an Azure Function to consume the certificate
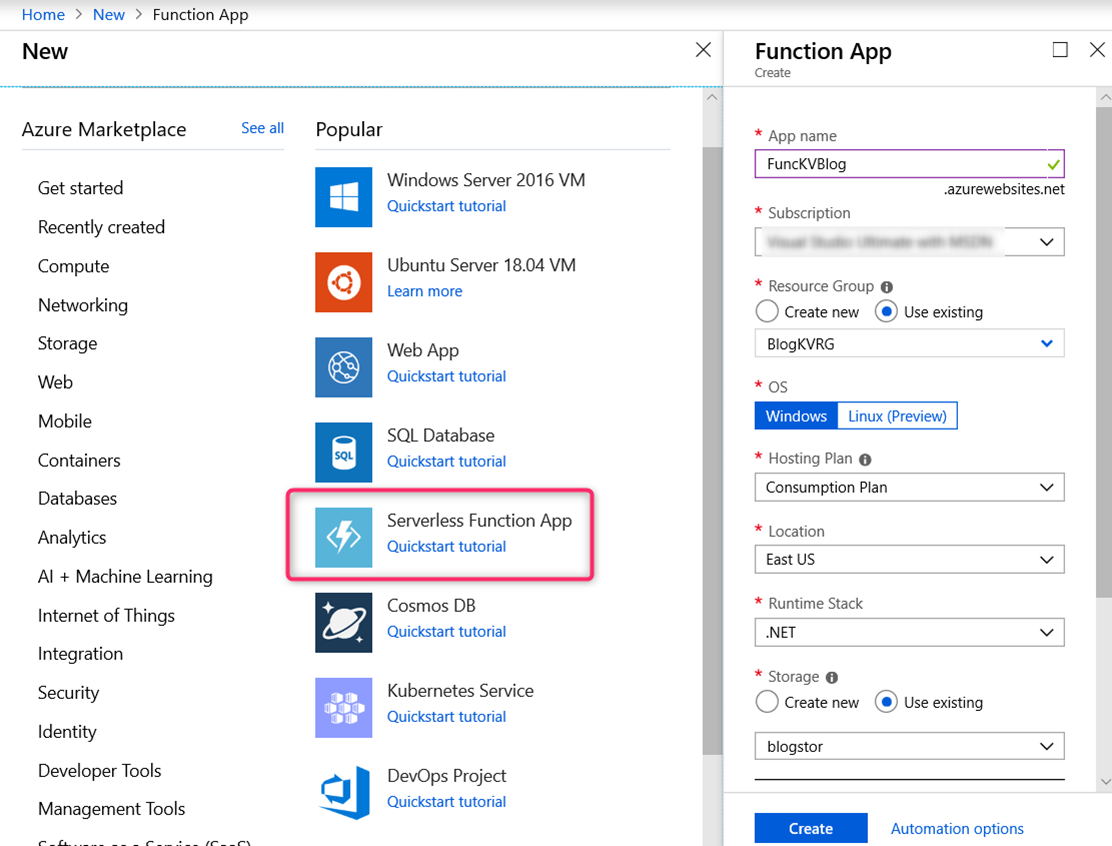
Create an Azure Function App
From the Azure Market Place in the Azure portal, create an Azure Function App. The Hosting Plan can either be Consumption Plan or App Service Plan.
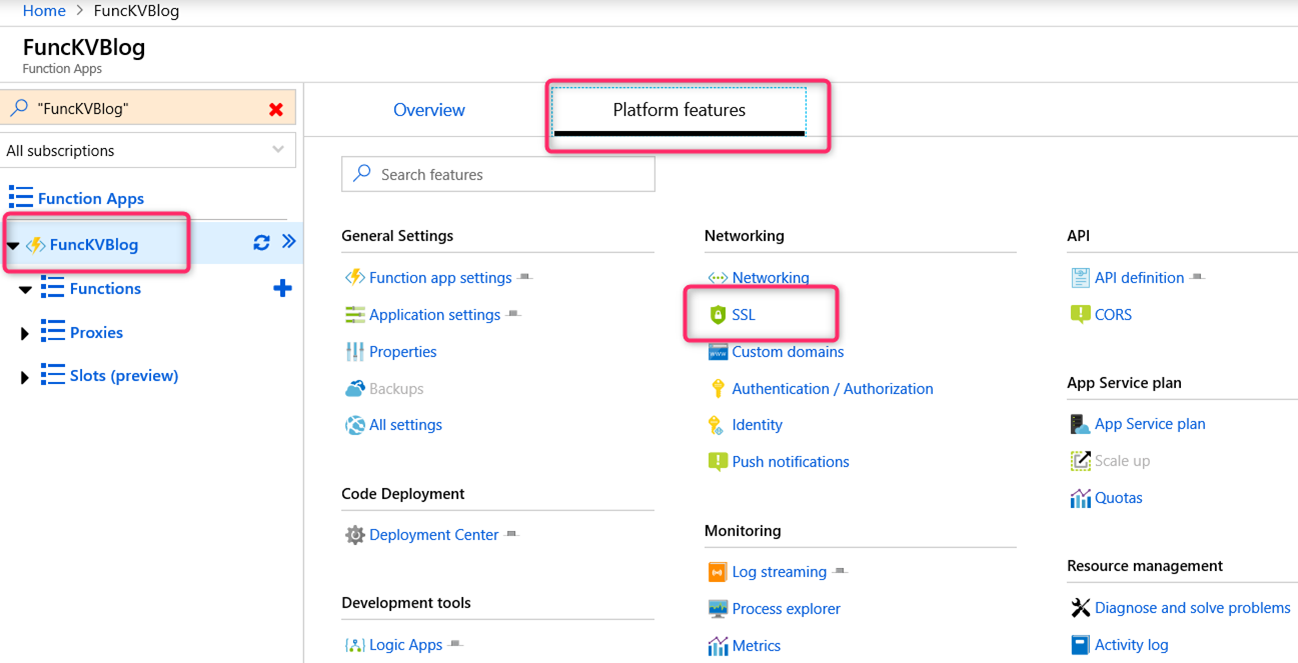
Upload the certificate to the Azure Function App
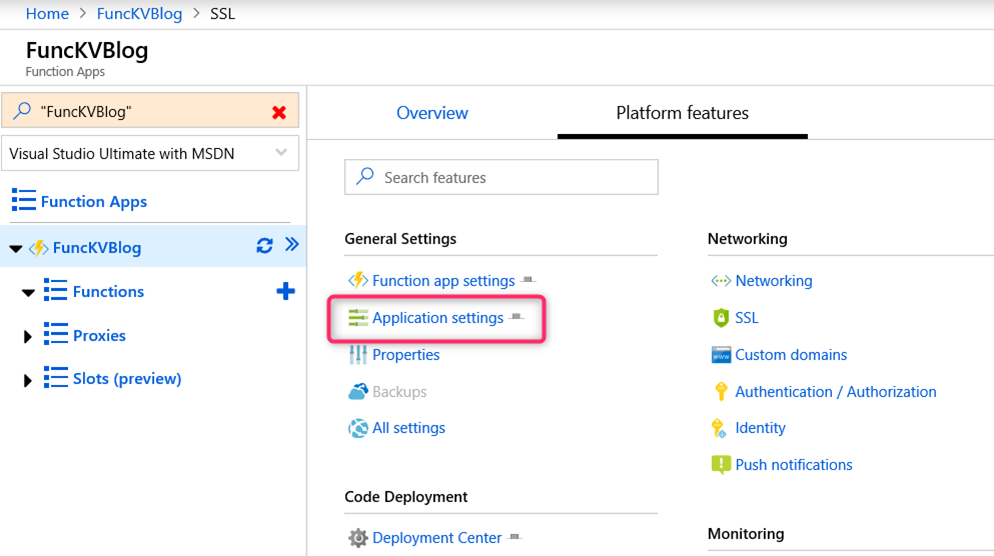
Go to the Function App resource we just created => click on Platform features tab => click on SSL link
From the SSL blade => click on Private Certificates (.pfx) tab => click the Upload Certificate link
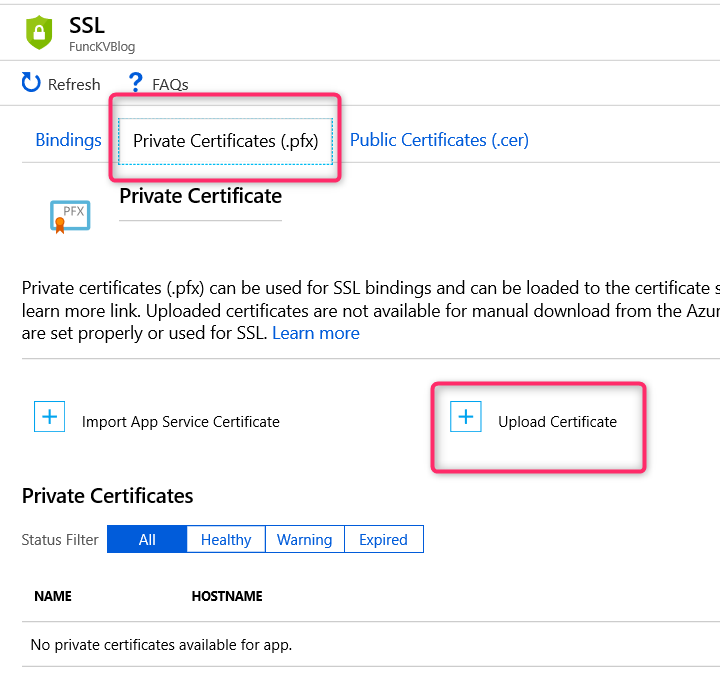
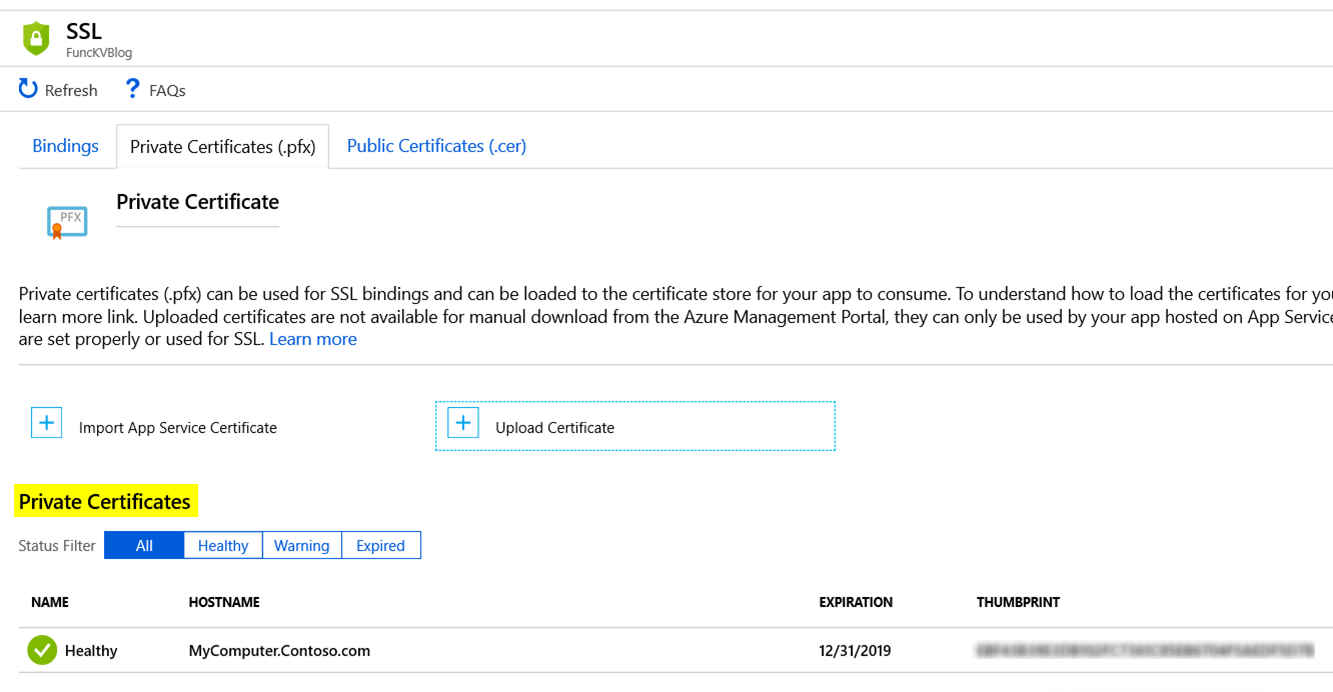
Go through the Certificate Upload wizard to provide a pfx file and password. Once the upload is complete, the certificate info should appear under the Private Certificate section
Configure the Function App to load the certificate
From the Function App blade, click on the Application settings link under the Platform features tab
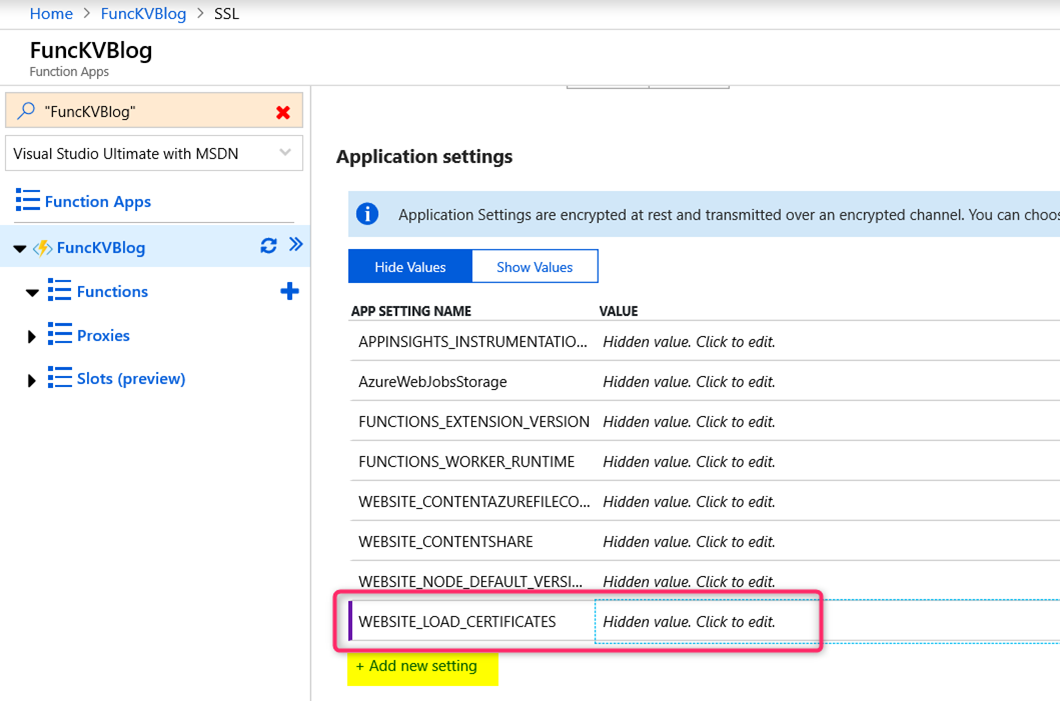
Under Application settings section, add a new setting called WEBSITE_LOAD_CERTIFICATES and set the value to be the certificate thumbprint. Click on Save button to save the new setting
Create an Azure Function
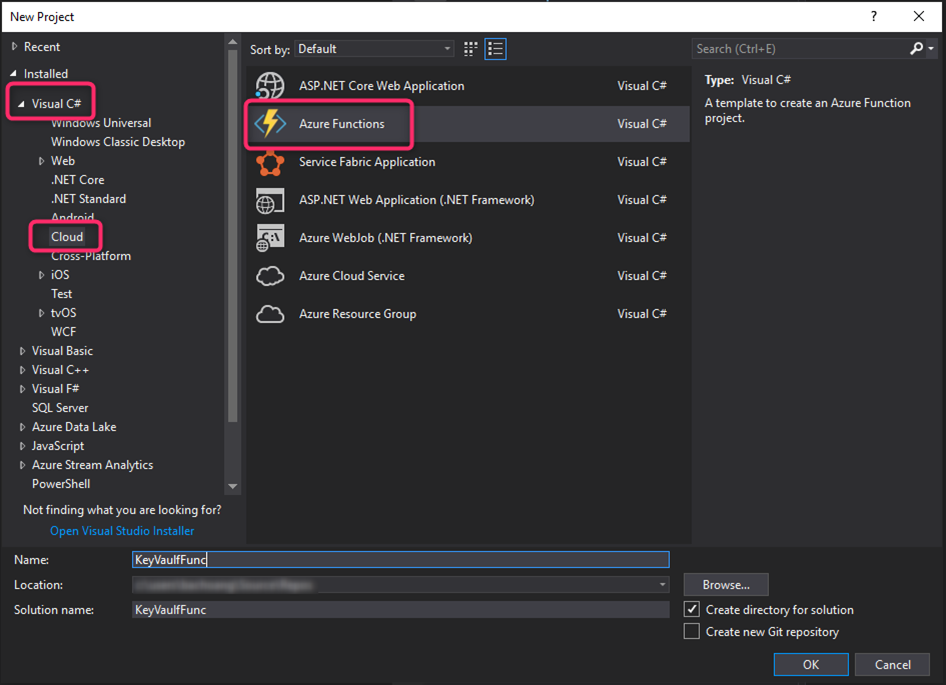
From Visual Studio 2017, create a new Azure Functions project. If you don’t see the “Azure Functions” template, you may need to install “Azure Functions and Web Jobs Tools” extension. See https://docs.microsoft.com/en-us/azure/azure-functions/functions-develop-vs for more info.
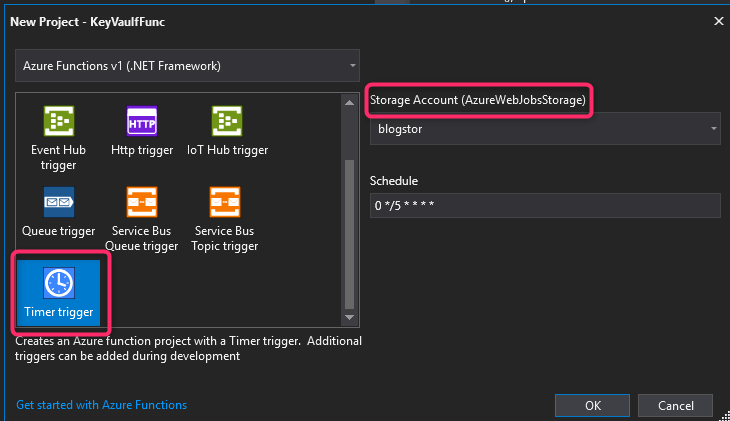
For the Function trigger, I just choose Timer trigger for the purpose of this blog. You an choose any trigger you like. Trigger is just a mean to invoke an Azure Function. If you have a storage account then go ahead and configure the storage account for the Function under Storage Account setting. The schedule setting uses CRON expression to define a timer schedule for the Function App. The prepopulated expression 0 */5 * * * * means that the Function is invoked every 5 minutes.
Now we need to write the code for this Function:
- Install the following Nuget packages from the Package Manager Console:
Install-Package Microsoft.IdentityModel.Clients.ActiveDirectory
Install-Package Microsoft.Azure.KeyVault
- Replace the code in Function1.cs with the following code:
-
Build and publish this Azure Function to our Azure Function App by right-click on the Project name and select “Publish…”
Note: If you have not done this already, make sure you log into Visual Studio with your Azure AD account.
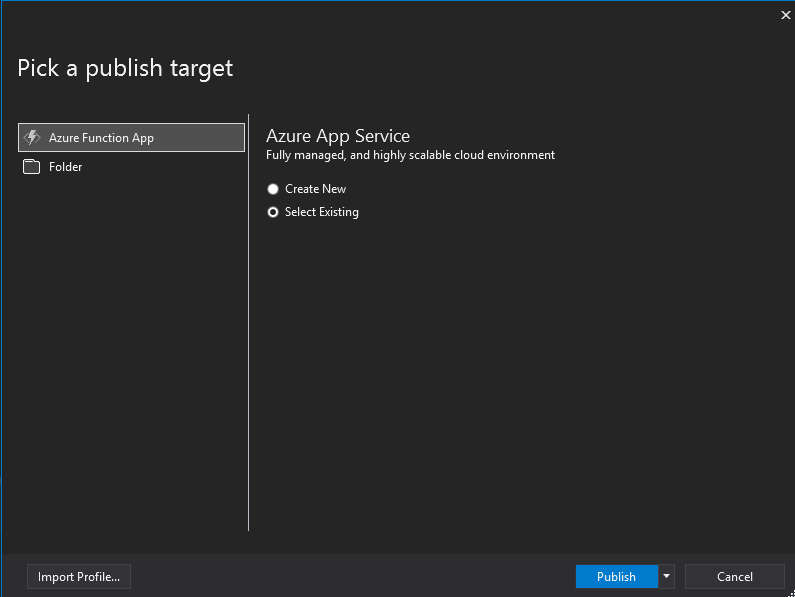
Select the target to be our existing Azure Function App and click “Publish”
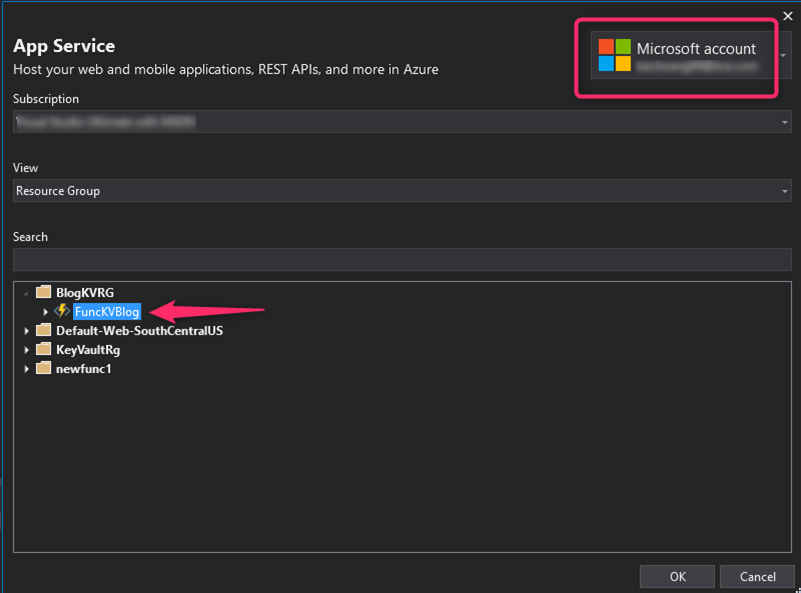
Select the right Azure Function App under the right Resource Group and click OK to publish
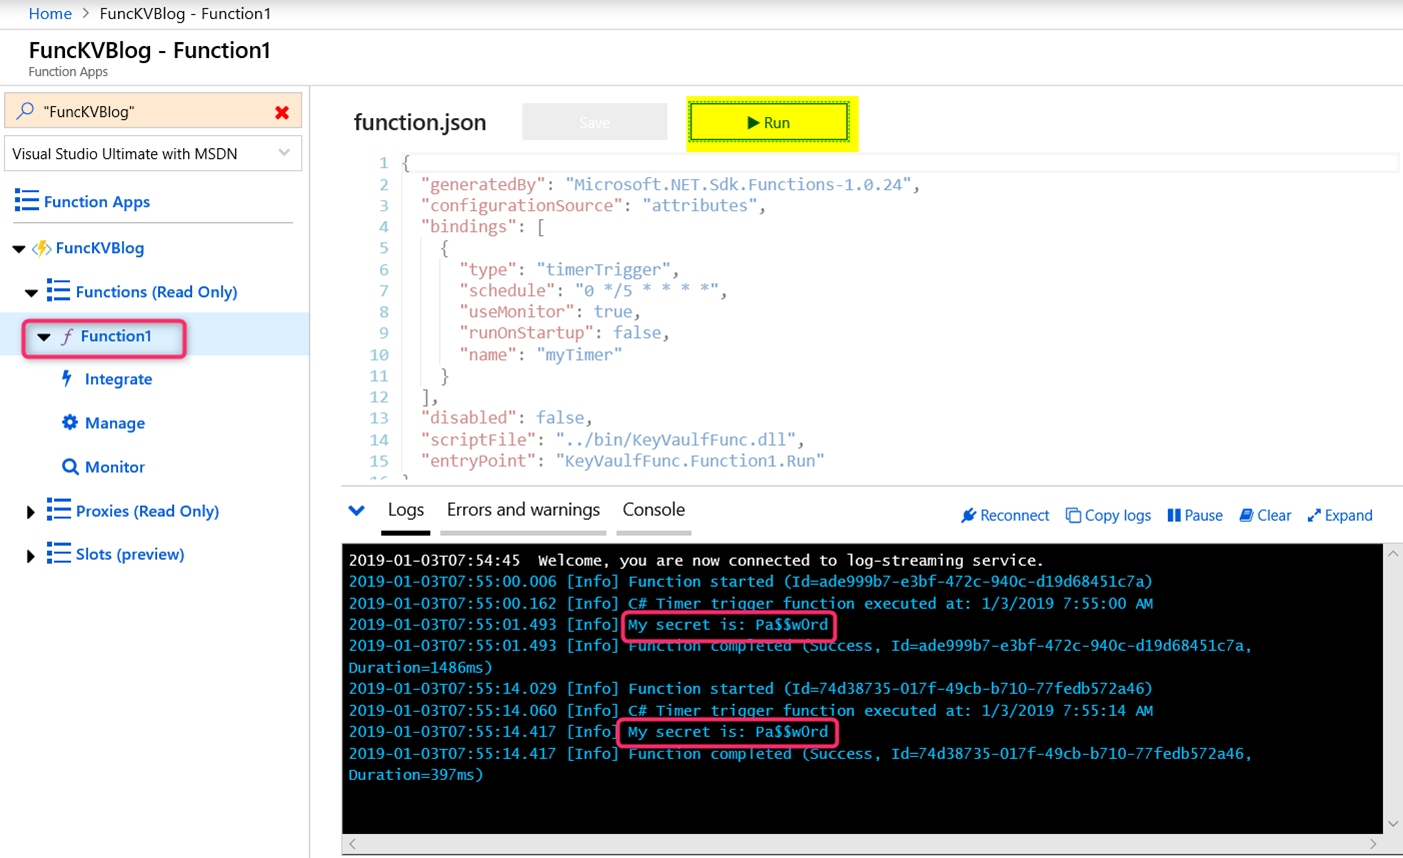
Once the publishing is finished, we should see our Function 1 appearing in the Azure portal. You can click on the “Run” button to see the output in the Logs section at the bottom.
References
https://docs.microsoft.com/en-us/azure/azure-functions/functions-develop-vs
https://azure.microsoft.com/en-us/blog/using-certificates-in-azure-websites-applications/